Angular disable button clicks and on condition example, full step-by-step guide. Sometimes it will be very beneficial for you to disable certain buttons for a while until certain task is successfully completed. For example, you can disable the submit button on the registration page after the user clicks on it during http request and wait for 5 seconds until you get response from the server.
Also, on a payment page whiles the user is still filling out his or her card details, you can disable the “pay now” button and enables it when the user fills out all the required information. So, it’s really a nice feature that all programmers need to know. Luckily, am going to show you an easy way to do it using angular, so let get started.
The “disabled” property of a button
Table of Contents
The “disabled” property of a button can be set to either true or false to make it clickable or not. This is the main concept/logic behind the problem we want to solve here. Let me first tell you about this property and how it works so that you will get a full understanding of it and when to use it.
The “disabled” attribute of the button tag originates from HTML not angular. The main purpose of its introduction is to provide an easy way for users to interact with the buttons on web page. For example, when a user sees an inactive button on the page, he or she will never border clicking it, and this is a very good user experience.
Mostly you will see this tag used in a way like…
<button disabled>Click</button>The absence of the disabled property indicate that the button is clickable. This is because you cannot set Boolean values like “true” and “false” to Boolean properties in HTML. For example, below code will all make the button disabled even though one of the disabled property is set to true and the other false…
<button disabled="true">Click 1</button>
<button disabled="false">Click 2</button>
However, in angular with the help of property-binding you can do it. The hack is that, when you bind the “disabled” property to a Boolean value, Angular will show and hide the property when set to true or false respectively. Mostly, you will bind it to a Boolean property in the component or use a condition to enable or disable the button dynamically until response is return or the http request is completed.
<button class="primary" [disabled]="true">Submit</button>The ng-disabled directive can also be used but I will leave that now for another topic.
Sounds confusing right?
Wrong, let me show you a practical approach.
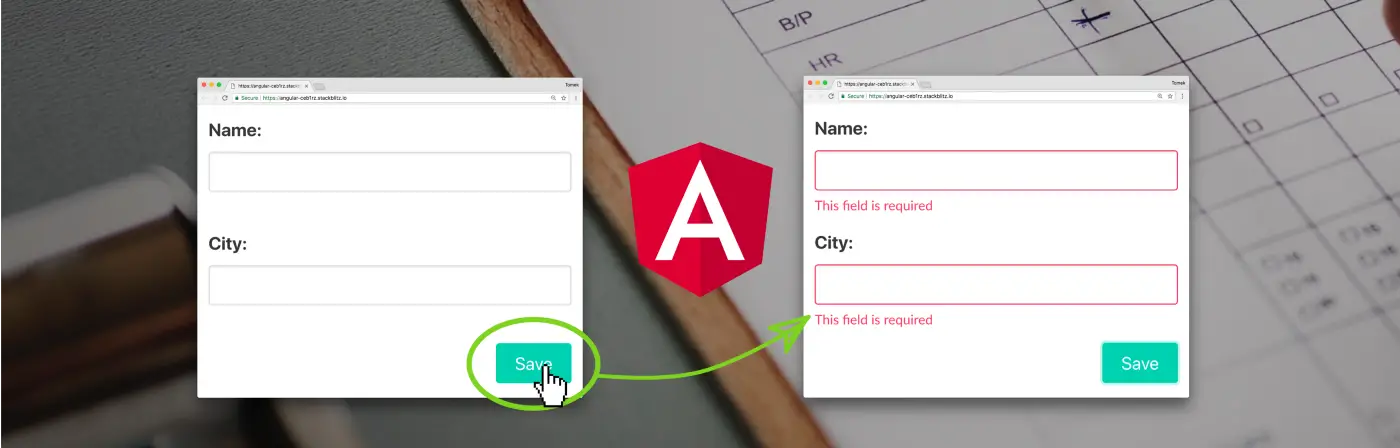
Disable button if input fields are empty angular example
You can disable the submit button if the input field or box is empty and enables when field is filled by using angular two-way databinding. This is indeed handy because sometimes you may develop a web app that will require only a single data from the user, therefore you will have to disable the submit feature after form submission.
Let me show you an easy way to do this…
Template
<P>First Name</P>
<input [(ngModel)]="firstName" />
<button [disabled]="firstName ==''">Submit</button>
From the above code, firstName property in the typescript component file which is bound to the ngModel two-way databinding directive to the input tag. Again, with the help of angular property binding button’s disabled attribute, we have bound the firstName property with a condition. The condition will evaluate to false when the input box has some text.
Component – Typescript file
import { Component} from ‘@angular/core’;

@Component({
  selector: ‘app-root’,
  templateUrl: ‘./app.component.html’,
  styleUrls: [‘./app.component.css’]
})
export class AppComponent {
  firstName=””;

}
In the main typescript component file, we have declared the firstName variable with an empty value.
Output: when the input field is empty

Output: when the input field contains some value

You can see that the angular disabled button attribute is really easy to use. But keep in mind that it plain HTML5 concept but angular property binding makes it easy to work with.
Check Also: Angular 10 fundamentals for beginners
Angular disable button after click example
You can disable a button in angular after it clicked by bounding the button disabled property to a Boolean variable in the component. But you have to ask yourself, how will the value of this flag be set? Well, we can use a button click event that will set a true or false value to the variable which will determine the state of our button.
Another question, what will be triggered when the event is fired? We will have a parameterized function and within its block is where our logic will be. Also, why would you want to disable a button after it clicked? Imagine, we have a web app that requires our users to upload only 3 audio files. Will it not be a good practice to disable the upload feature when the user is about to exceeds that limit?
It is, so let see how, it really easy.
Template
<P>Click on submit to see the result</P>
<button (click)="disableFunc()" [disabled]="btnstate">Submit</button>
Inside the template we only have a paragraph tag and a button that has a click event which is bounded to a function in the component. Again, the “disabled” property is bounded to a property in the component which determines the state of the button.
Component – Typescript file
@Component({
     selector: 'app-root',
  templateUrl: './app.component.html',
  styleUrls: ['./app.component.css']
})
export class AppComponent {

  btnstate: boolean=false;

  disableFunc(){
    this.btnstate = true;
  }
}
Inside the component, the only thing we are doing in the function is changing the value of the Boolean variable. The state of the submit button depends on the variable because we have bound it to it in the template. So, the button it state will change automatically whenever the variable value changes to either true or false.
Output: when the button is not click

Output: after the button is clicked

There is another way you can do this entirely in Typescript with the help of “click event” ($event) by passing the whole tag that the event happened on to the components. So, for example, if we are able to pass the submit button tag itself to the component, then we can easily access it disabled property and set it value to either true or false. The event handler will be triggered immediately the event is fired, and there is where our logic will be.
It’s really easy, let me show you how….
Template file
<P>Click on submit to see the result</P>
<button (click)="onButtonClick($event)">Submit</button>
Can you see the changes in the above code? The disabled property is not bound to any flag in the component because we are rather passing the whole button tag to the component.
Typescript file
import { Component} from '@angular/core';

@Component({
  selector: 'app-root',
  templateUrl: './app.component.html',
  styleUrls: ['./app.component.css']
})
export class AppComponent {

  onButtonClick(event: MouseEvent){
    (event.target as HTMLButtonElement).disabled = true;
  }
}
Inside the “onButtonClick” function, we have an argument that requires a mouse event, and this is where the tag is being passed to the function. Because the mouseEvent object will provide us the event type and the element the event occurred on. Then we first cast the event to an HTML button element and disabled the button. It’s easy with this approach, right?
Check Also: How to install Angular 10 CLI
Angular: how to disable button on condition
You can disable a button in angular based on a certain condition provided in the component. Example is when you want to perform a phone number validation. In my country Ghana, the phone number has to be equal to 10 digits. So surely, if I have a form that requires users to provide their phone number, I surely have to validate and make sure that the length of it is not more or less than 10.
To achieve this, we have to implement two-way databinding and also use the (input) event. The (input) event will be bound to the phone number input form and the event handler will keep checking it length whenever a never value is entered. And to disable the button, we have to also bound it state to a variable in the component.
Let me show you how you can disable a button on condition in angular using two-way binding and (input) event…
Template file
<P>Enter phone Number:</P>
<input (input)="onInput()" [(ngModel)]="numlength" type="text" placeholder="phone number" />
<p *ngIf="btnState">Phone number must be 10 digits</p>
<button [disabled]="btnState">Submit</button>
Notice that we have an if condition that will show the text “Phone number must be 10 digits” when the user provides the unrequired character length.
Component file
import { Component} from '@angular/core';

@Component({
  selector: 'app-root',
  templateUrl: './app.component.html',
  styleUrls: ['./app.component.css']
})
export class AppComponent {
  numlength:any;
  btnState:boolean=false;

  onInput(){
    if(this.numlength.length != 10 ){
      this.btnState = true;
    }
    else{
      this.btnState = false;
    }
  }
}
We have two properties in the component class, one for checking the length of the digit and the other for the button state. And inside the onInput event handler, we are checking if the phone number is not equal to 10 digits so we can disable the button.
Condition output: when phone number is less or more than 10 digits

Condition output: when phone number is equal to 10 digits

Check Also: Angular 10 tutorials for beginners
How to disable a button if no input and after click in angular?
Now let combine all that we have learnt and disable a button after clicked once and when there is no input value. We will use the keyup event instead of the input event we used previously. The two are almost the same because they are both triggered by the keyboard. But take note of these two angular directives ngDisabled and ng-disabled. The two does the same thing as applying display none to a Dom element. Although we are not going to use it but I want you to be aware of it because it angular 2 directive for disabling a button and other HTML elements.
Alright, let get to what I want to show you.
We are going to create an angular app that will listen to the input event triggered by the keyboard and pass the entire event to the component. Then we can access the element that the event happened on by accessing the target object of the event ($event). Also because we want to disable the button after it clicked, the app will also listen to the click event of the submit button and call the event handle or a function called buttonClick().
Template file
<P>First Name:</P>
<!--listen to the input event with the keyup-->
<input placeholder="Enter first name" id="name" (keyup)="onKey($event)">
<br/>
<button class="btn btn-primary" (click)="buttonClick()" [disabled]="click">Submit</button>
The keyup event will only be fired when you press and releases a key on the input element. Then angular will pass the whole event object to the component onkey($event) method, and within the block of this method, we check and pass true or false value respectfully when there is an input value or not.
Component file
import { Component} from '@angular/core';

@Component({
  selector: 'app-root',
  templateUrl: './app.component.html',
  styleUrls: ['./app.component.css']
})
export class AppComponent {
  click : boolean = true;
  buttonClick(){
    this.click = !this.click;
  }
  onKey(event: KeyboardEvent) {
    // Checking to see if value is empty or not
    // remember we are using ternary operator here
    this.click = (event.target as HTMLInputElement).value === '' ? true:false;
  }
}
Check also, How to validate an email address in JavaScript
Angular disable a button if form is not valid
If you create an angular form, either template driven or reactive forms, you can disable the submit button if all or any of the input field is not valid. You do need to learn how to perform form validation first before. It really easy but I will leave that for now because it a whole topic on it own.
To disable a button in Angular based on the form validity, you need to provide template variables for all your inputs or apply the control-name directive to all of it. Suppose you have an email input with template variable userEmail, you can check it validity and disable the submit button as it’s done below.
<button type="submit" [disabled]="userEmail.invalid">Submit</button>Note that the above code needs to be in the template file.
Check also: How to add double quotes around java object and string variables
Angular enable/disable button dynamically
You can disable a button dynamically in angular by performing a complex operation like HTTP request and take the necessary action based on the result. For example, imagine we have an end-point that returns all the list of students in a class once each day. Suppose the student list will only be available when you click on the fetch button on the web app. You can use the angular disable button feature together with Date-Time API to make the button active for click only once per day. That’s when the button is clicked and the http request is successful, you disabled it until the next day.
I just gave you a hint and am guessing it should be difficult to do because you will just be repeating what you’ve learnt in the above examples. Try it and let me know how it goes, if you face any challenges let me know in the comment box below.
That’s all I wanted to show you in this full “angular disable button” step-by-step guide. Now that you have gotten some concept about web development, see how you can make money on the dark web as a computer programmer. Also, how to use Angular mat-icon list.