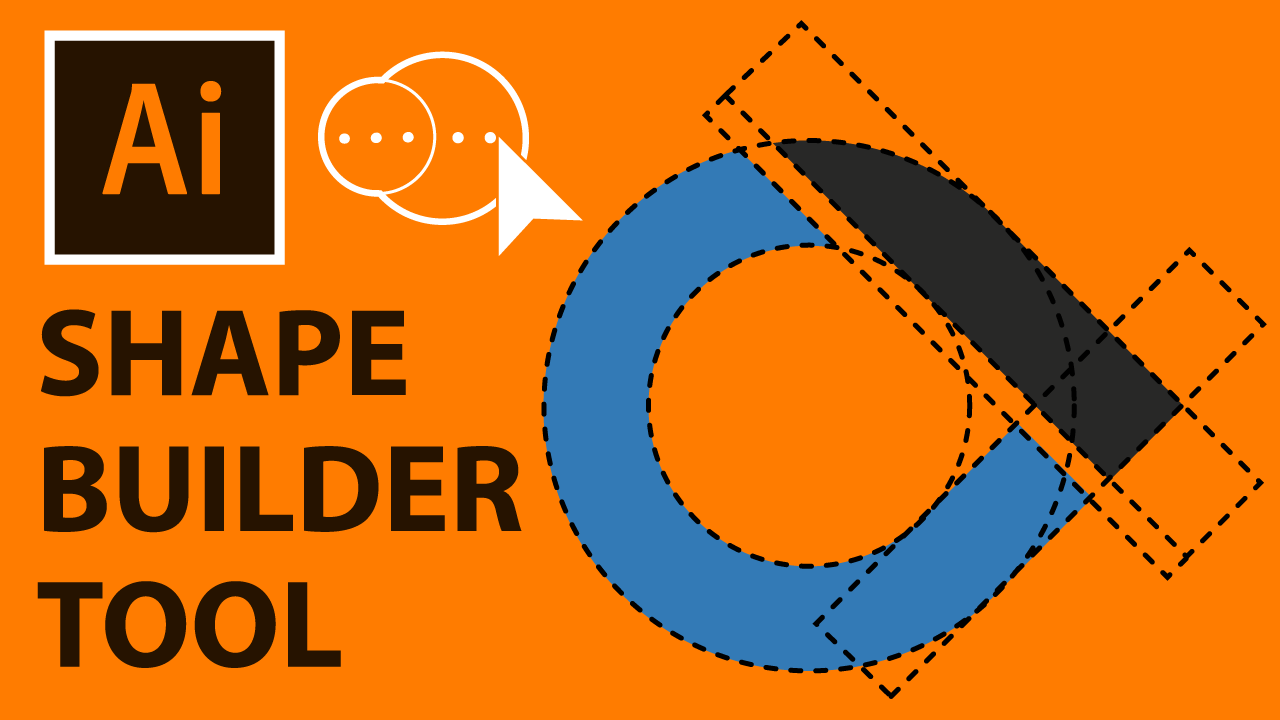
Learn how you can use the Illustrator shape builder tool to create basic shapes. After this lesson, you will be able to color, remove, and combine shapes of any imaginary art you want to create. There are a lot of tools in adobe illustrator that you can use to work with shapes. Such as the pen tool width tool and the pencil tool, most people prefer to work with these tools a lot. And…
They sometimes forget that the shape builder tool even exits. It’s a tool that is very easy to use and when you master it, you will find yourself using it almost in every project. And it going to save you a lot of time because it makes working with shapes very easy. And with it you can create all sort of shapes you want, you can also use it to color shapes too. That is one hidden use of the shape builder tool most people don’t know of. So…
What is the shape builder tool in illustrator?
Table of Contents
It is the tool in the illustrator toolbox with two circles and one arrow pointing to the left. Have a look at the image below to see how it actually looks like in the program.
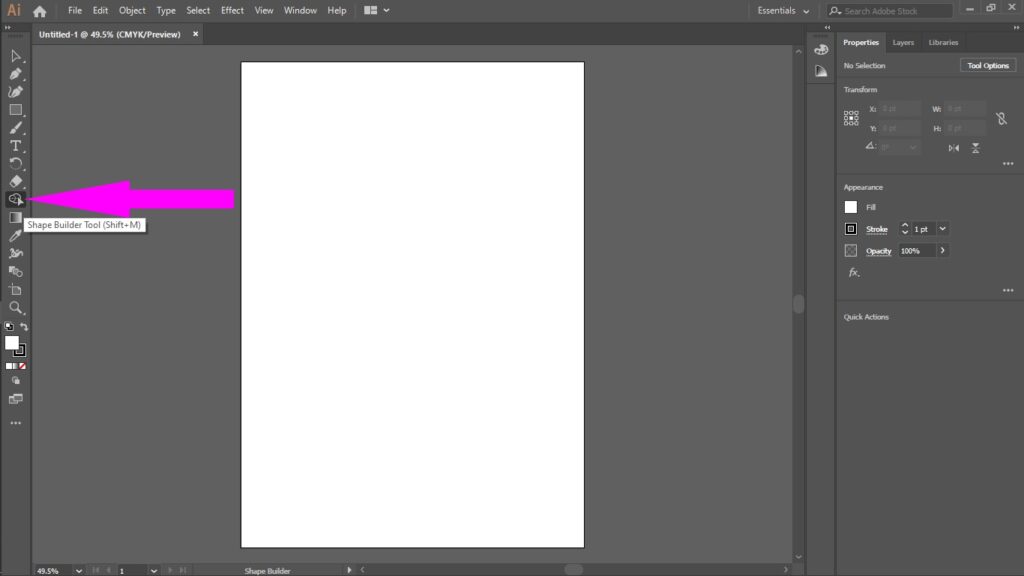
It is next to the eraser tool and before the gradient tool. The main purpose behind the creation of that tool is to help build a single shape from other components. What do I mean? If you want to draw a big shape, you have two choices. Either you will draw the whole shape with the pen or the pencil tool without joining any shapes. And second is either you will create multiple shapes and remove or combine them with the shape builder tool to achieve a single shape.
Check Also Install Angular Cli And Other Tools
Most designers like myself prefer going with the second approach because it easy and it saves time. And with it, you can adjust whichever part of the shape you want to. But if you go with the first approach, you can also do the same but you will find yourself wasting a lot of time and putting in a lot of effort. So I will encourage you to use the shape builder tool. But can you just run the program and use it? No, you need to know…
How to Use Shape Builder Tool in Illustrator?
Illustrator shape builder tool shortcut is Shift + M. Clicking this command on your keyboard will select it. And the only way you can use it is to have some shapes on the project. You can work with it with one or more shapes. All of it doesn’t have to be the same, they should be based on what you want to achieve. So the concept is simple, you create different shapes and use the illustrator shape builder tool builder to work on it to achieve a single task.
Don’t be too confused if you don’t understand all that I’m saying. We are going to do practical work on it together. And I urge you to practice along with and not just to read because practice makes a man perfect. And if you get into any issue, just let me know in the comment box below.
So without wasting much time, what am going to do is to show you…
3 Things you can use The Shape Builder Tool to Do
So what we are going to do is to draw a basic flower. And remember, there are only three things you can use the shape builder tool for (Combine shapes, remove shapes, and color shapes) Those are the basics and we are going to implement all of them by drawing a basic flower form different shapes.
The final project is displayed in the image below. After you have gotten the idea of how this works, you can then go ahead and build more complex shapes. However, that doesn’t have to be hard. All that you need to know is how you can use the shape builder tool to do those three things listed above. And with such knowledge, you are good to go.
Shape Builder Tool in Illustrator: (Combine Shapes)
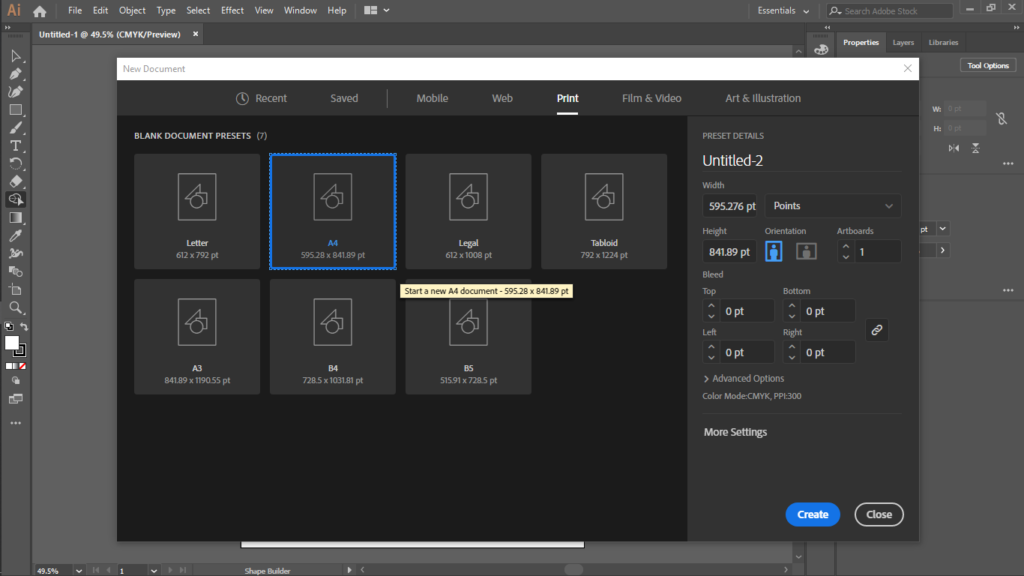
Before we can do anything, we need to create a project environment where we will be working on. So let do it together by running your illustrator and creating a project of A4 size. Or simply click on file/new/print/A4 as shown in the image below.
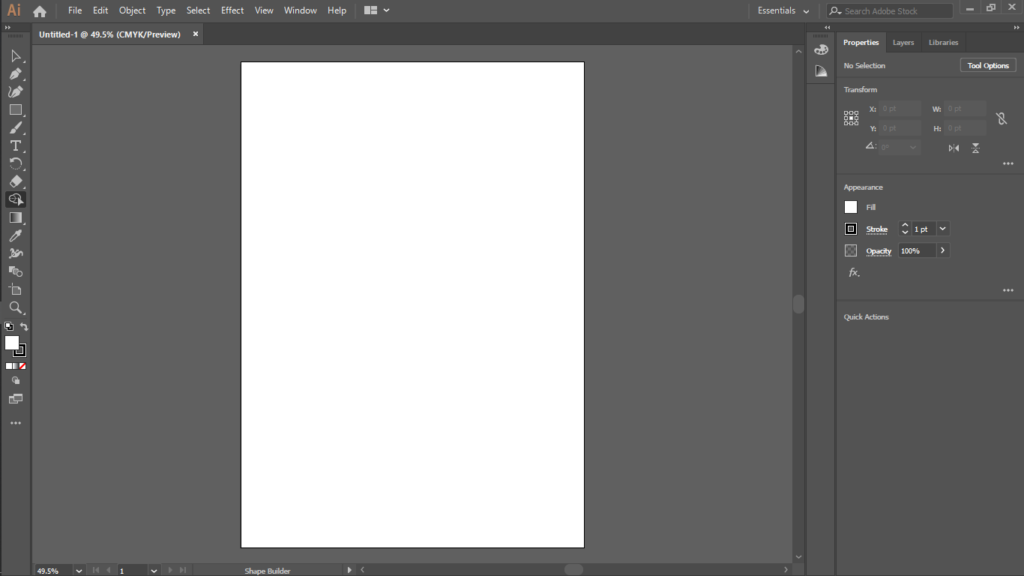
And immediately you click on the A4, you should have a screen similar to this…
Okay so now that you have your project set up ready, let begin drawing some shapes.
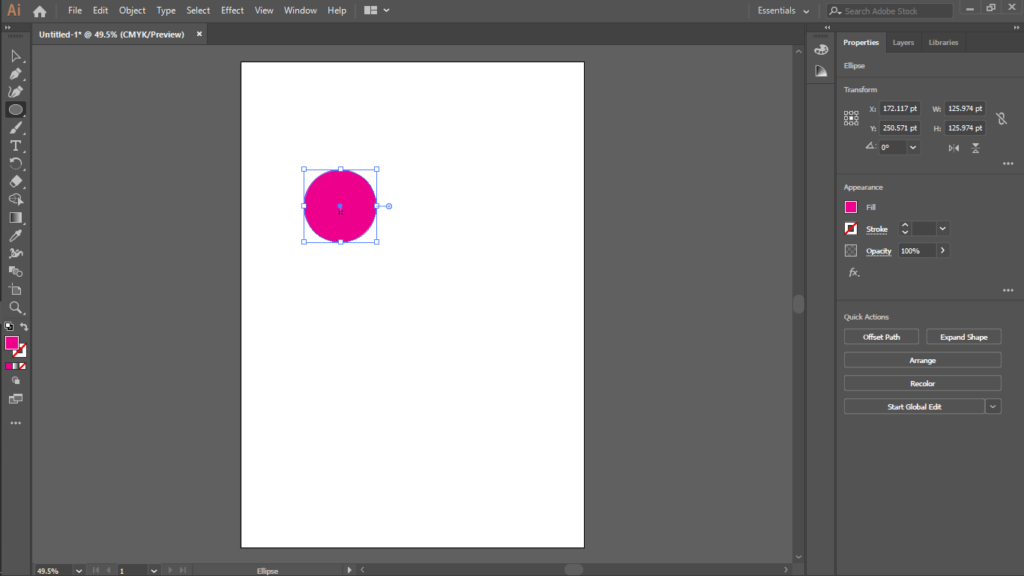
Click on the eclipse tool, it among the tools in the rectangle tool. Or simply click “L” to select it, then draw a perfect circle by holding a shift and mouse drag. Don’t release your hand on the mouse until you have gotten the shape of the circle you want. It shouldn’t be too big too, just have a look at the image below and create something similar to it.
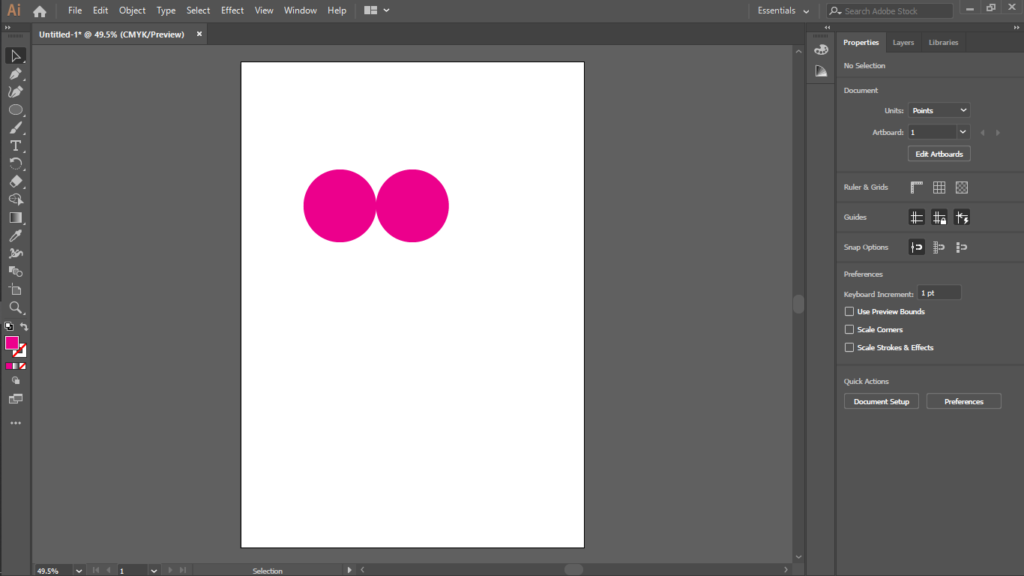
Then click and drag the circle to the right by holding Alt + shift to create a copy of it. Or simply press Ctrl+ C and Ctrl+ V to copy and paste respectively.
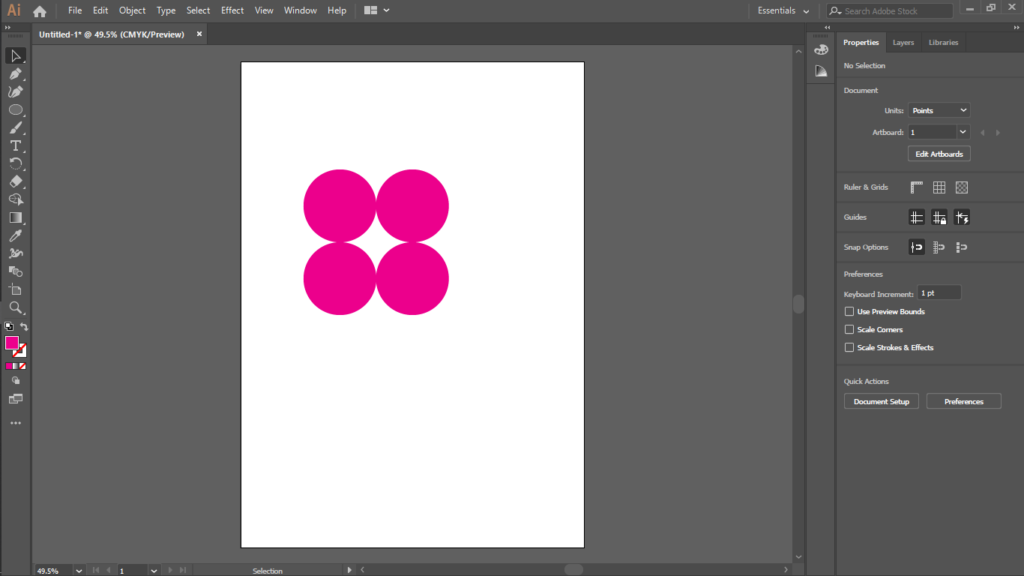
Again, use the selection tool to select all the two circles. Then click and drag the two circles down by holding Alt + shift to create a copy of it. So you should have a four circles in total.
Well, congratulations! You are just one step away from creating the basic of the shape.
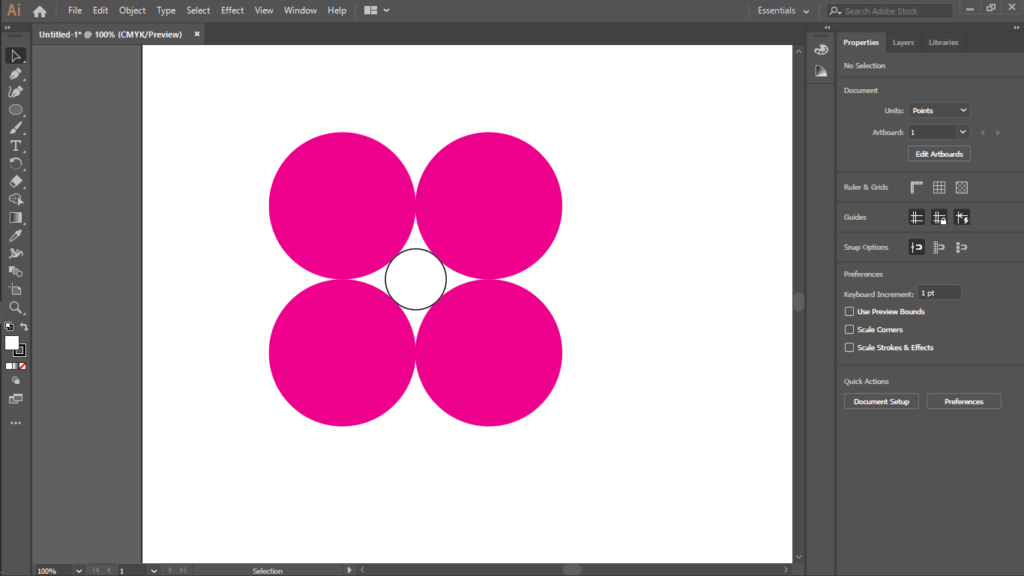
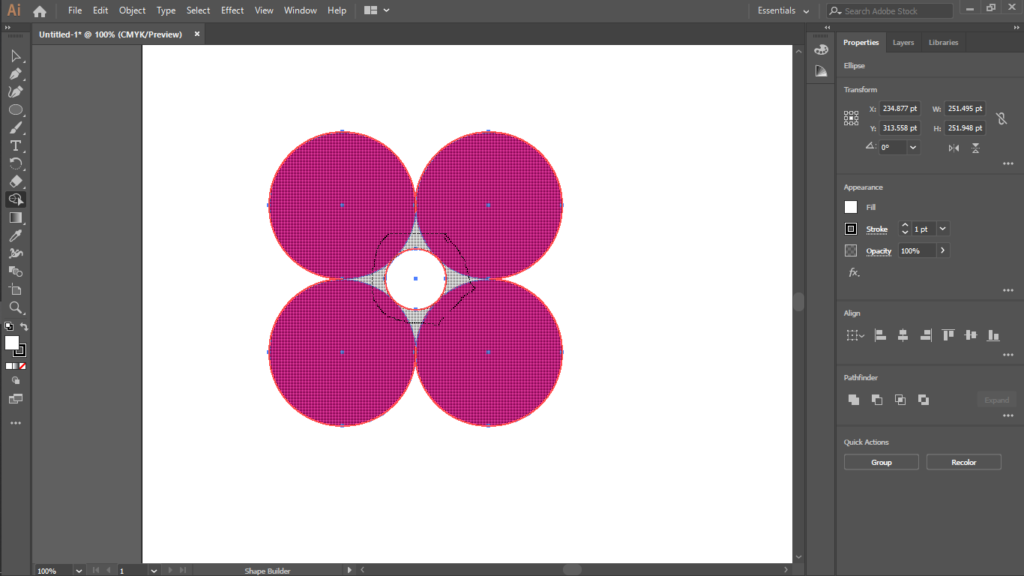
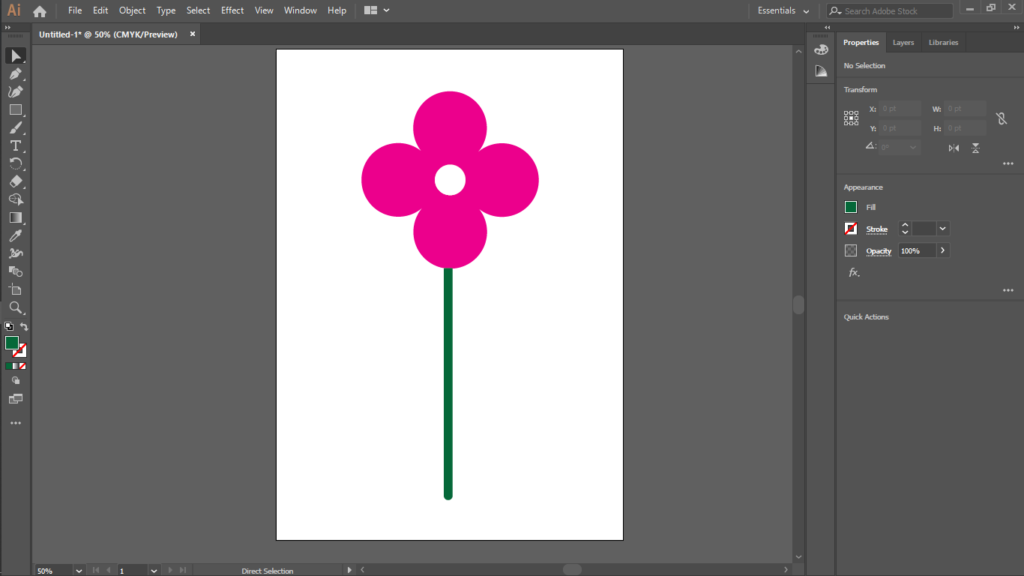
So, draw a little circle in the center of the four circles and let its edges touch all the four big circles as shown below. Remember to give it a little stroke for learning purposes, we will get rid of that at the final segment.
Then Select all 5 circles by using the selection tool. Then whiles all the circles are selected, pick the shape builder tool by clicking on Shift + M. Then use it to draw a circle outside the small middle circle. Look at the reference in the image below and see how I drew freely a circle with the shape builder tool.
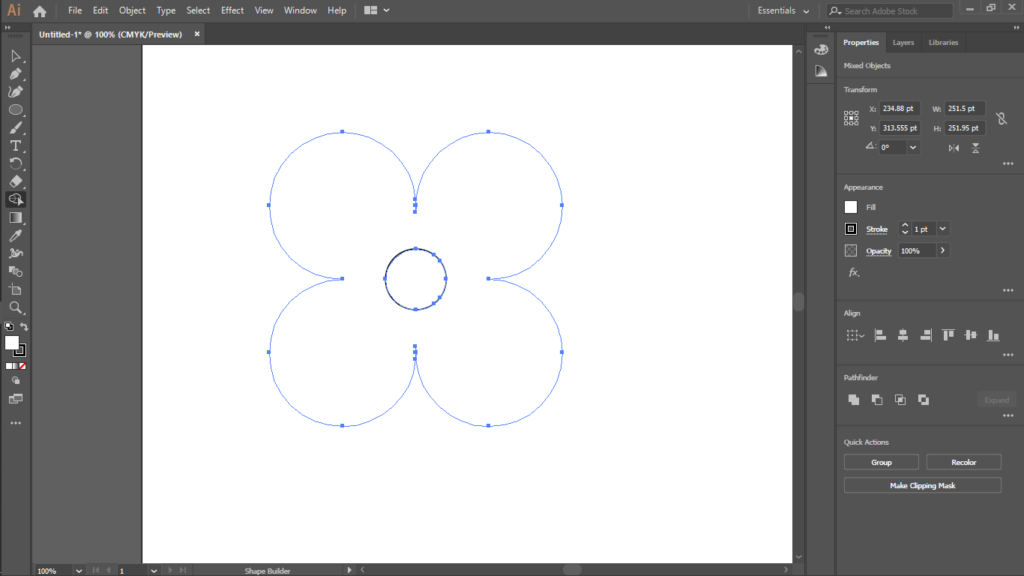
Then release your mouse and you should see all the big layers merge with each other like what’s in the image below. The color that we gave to the big circles are gone but don’t panic we can refill it with a single click. That’s how you combine shapes with that tool. You simply select all the shapes you want to join together and then click through the part you want to merge.
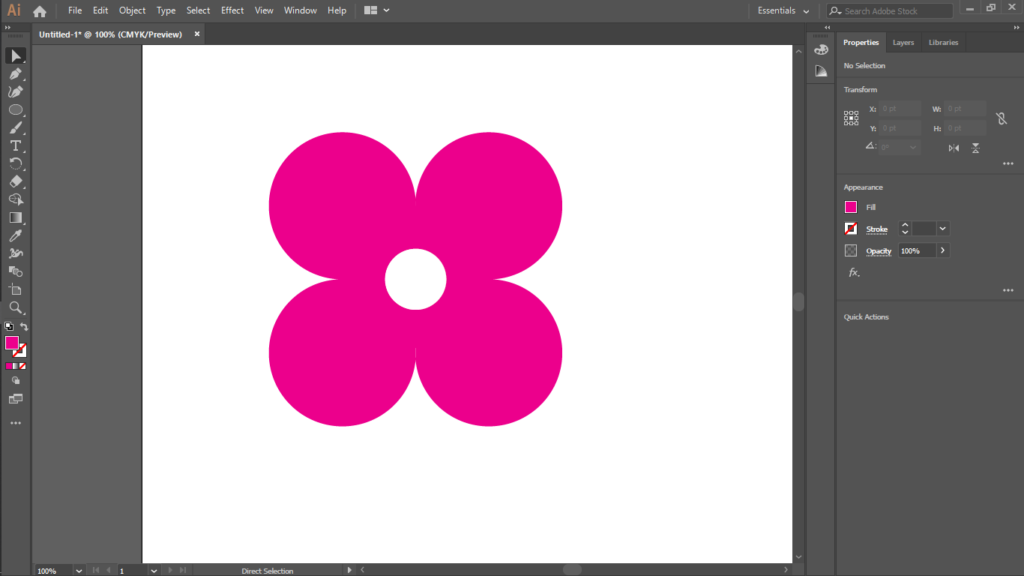
So refill the big circle with our color back and also remove the stroke of the inner circle. It makes the flower looks somewhere, so don’t give it any stroke.
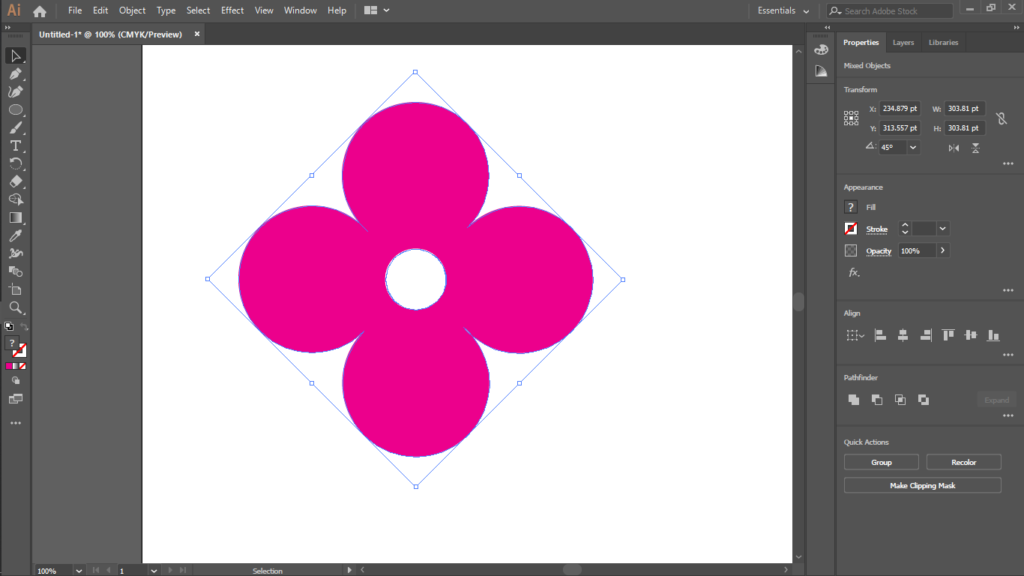
Then select everything and give it 90 degrees clockwise rotation as shown below.
That’s it we have now gotten the head of our flower. We then need to see how we can create the down part.
Select the rectangle tool and draw a little box of a meaningful flower stem. Note, it shouldn’t be too long or too short. And also notice how I gave the down button of the box a little border ratio.
Finally, let draw the leaves by using the ellipse tool to draw two oval circles. Remember not to hold shift this time, because holding shirt will create a perfect circle. Look at the image below for a reference.
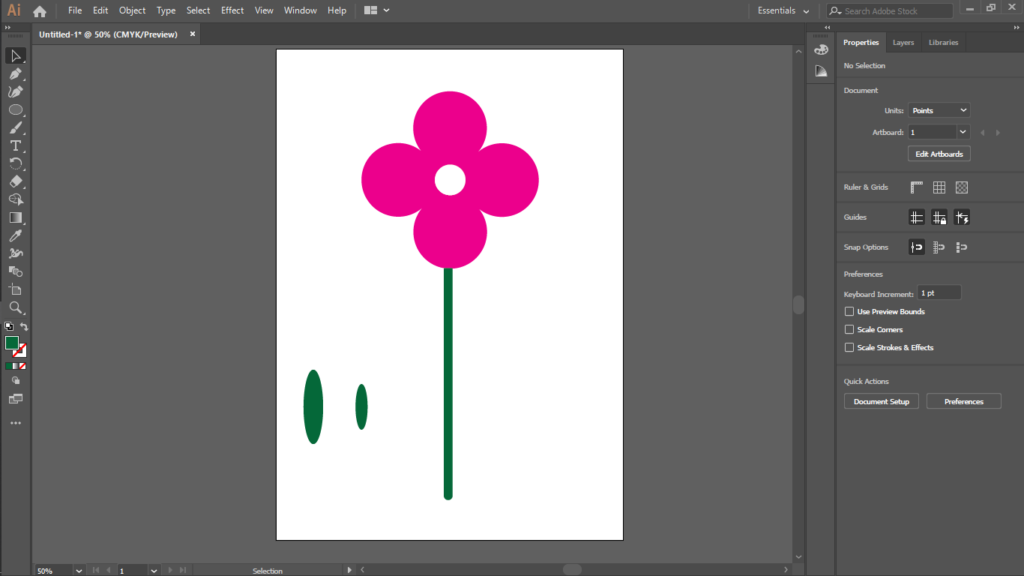
Then position the big leaf to the right of the flower stem and the small leaf to the left.
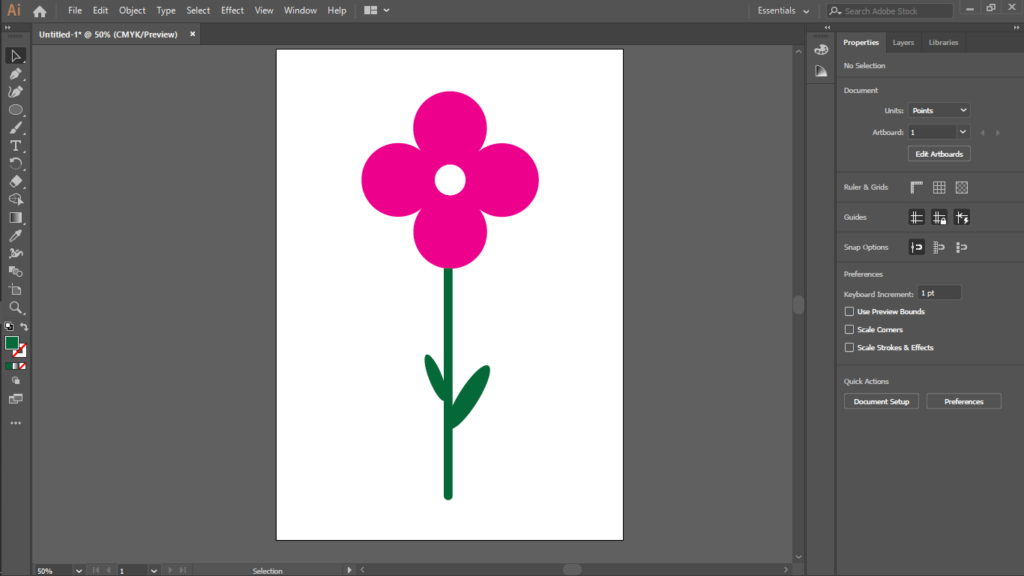
Well done. You have now mastered how to combine different shapes to create a realistic object. To give our flower I bit more clean look, you can go ahead and give it a gradient background.
Check Also:: What Is Important In Life
What I want to show you next is how you can remove shapes. So pay very close attention because it’s essential for your design journey…
Shape Builder Tool illustrator: (Remove Shapes)
Knowing how to join shapes is not the only thing you need to know. In fact, to create a complex object out of shapes, you will remove and join some parts. So what will happen when you know only how to join shapes? You can’t do much and you will struggle a lot with yourself while there is an easy way to remove part of shapes.
But don’t be worried I have got you covered and within a few minutes, you are going to master it. So let begin with a basic object, we are going to create different shapes and remove some parts of it to achieve a single object.
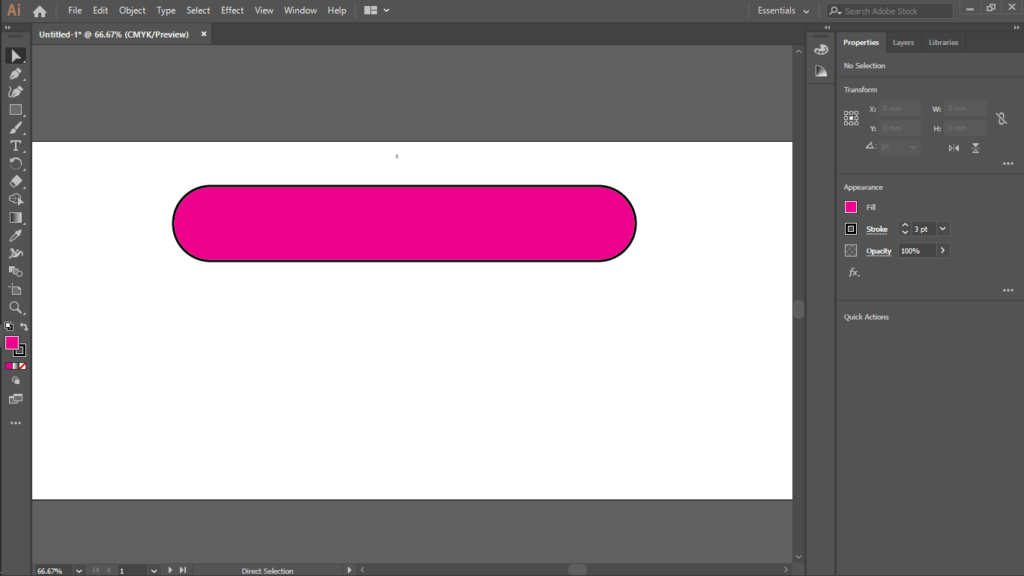
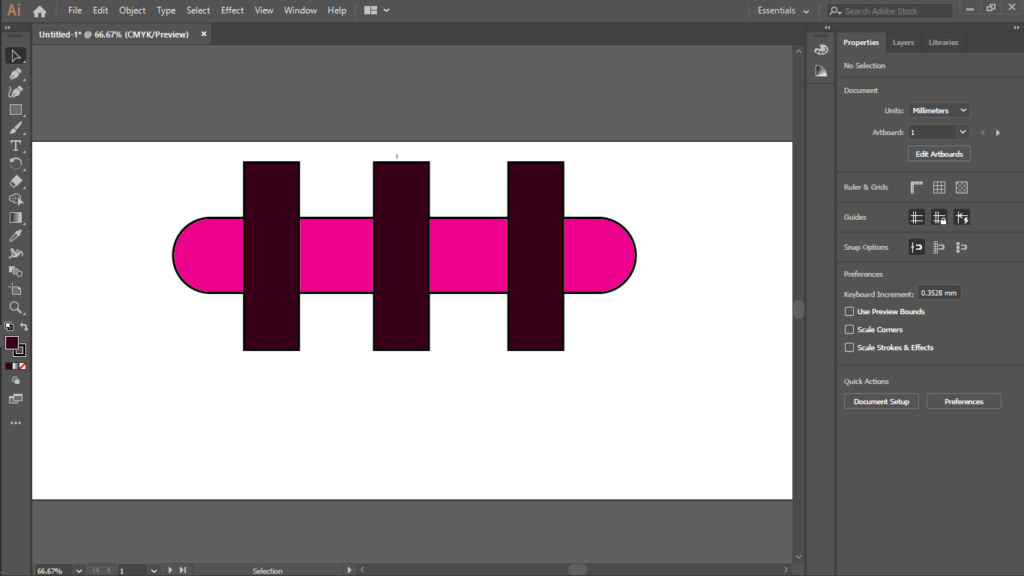
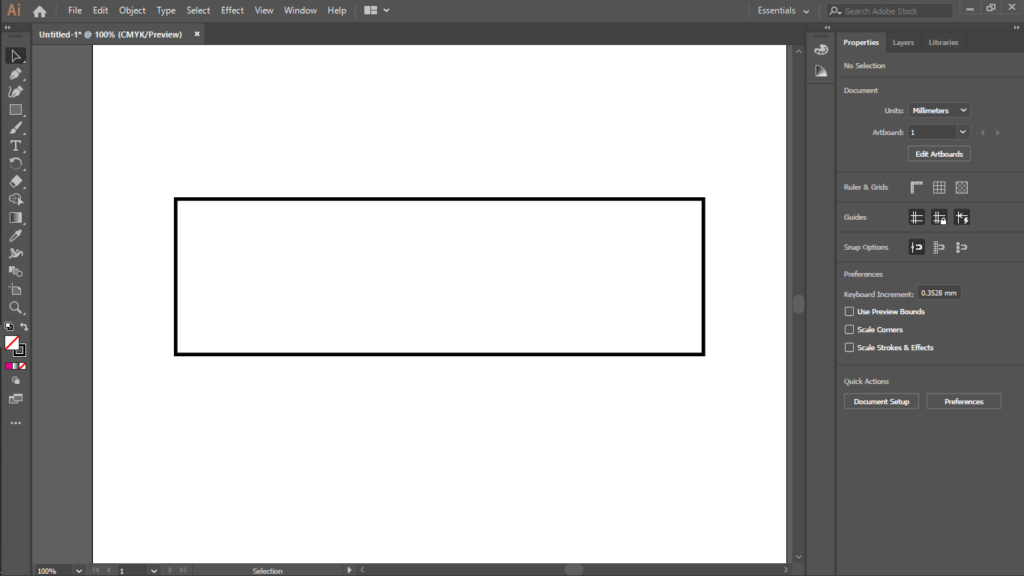
Select the rectangle tool and draw a rectangle of width wider than the height and give it some border ratio. Also, give it a stroke of 3 pixels as seen below.
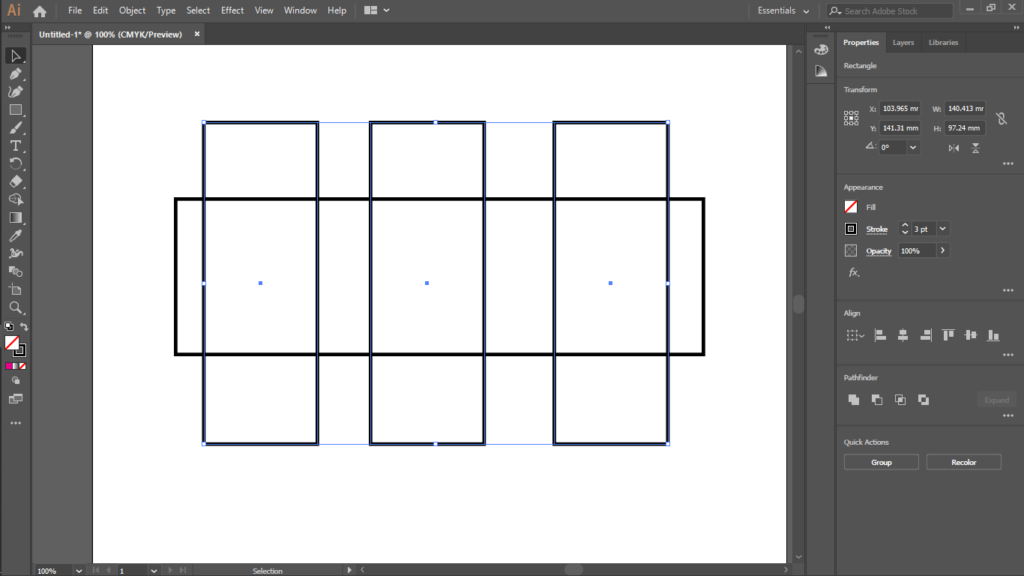
Next, draw a rectangle of height longer than the width. Then position it to the left of the first rectangle. Now, duplicate two more times and position one at the center and the other at the right of the parent rectangle. Remember to give it a border, a different color, and a stroke of 3 pixels.
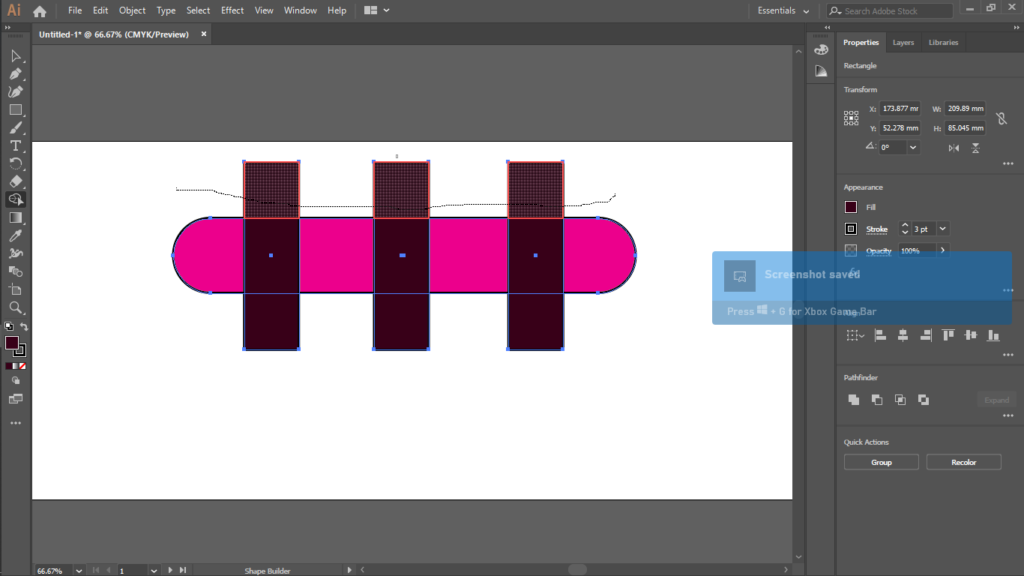
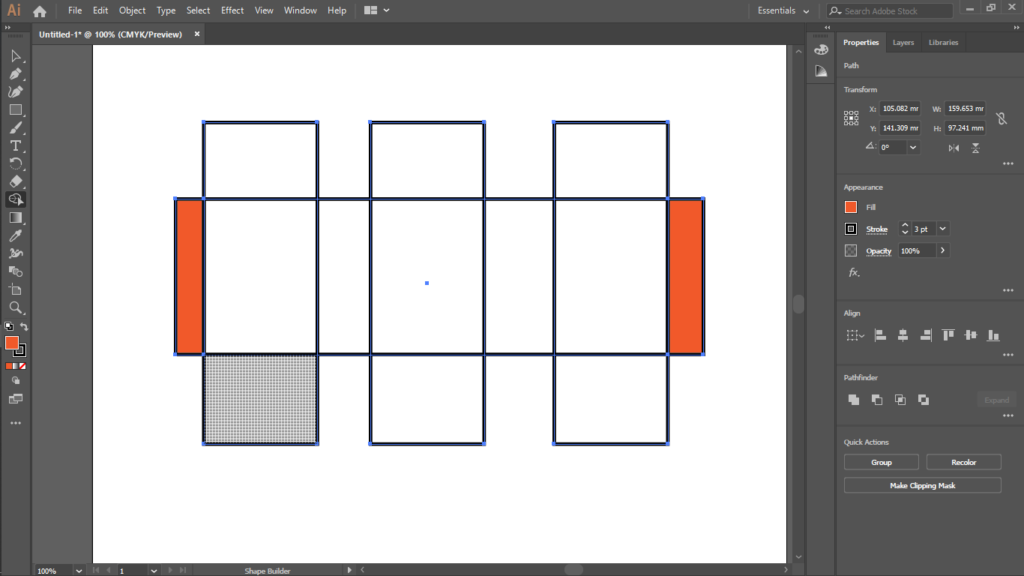
What we want to do is to remove the top part of the three rectangles. So select all the rectangles and pick the Illustrator shape builder tool. Then press (Alt + mouse drag) through the top of the 3 rectangles. Doing so will remove all the parts you just drag the mouse through. So here is what you should know. To remove parts of a shape, you press (Alt + mouse drag), and to join parts of shapes, you just drag the mouse through the parts you want to merge with the shape builder tool. So delete the top part as shown below.
When you release your hand from the mouse, you should see all parts deleted. (Note that this is what I want you to master in this part)
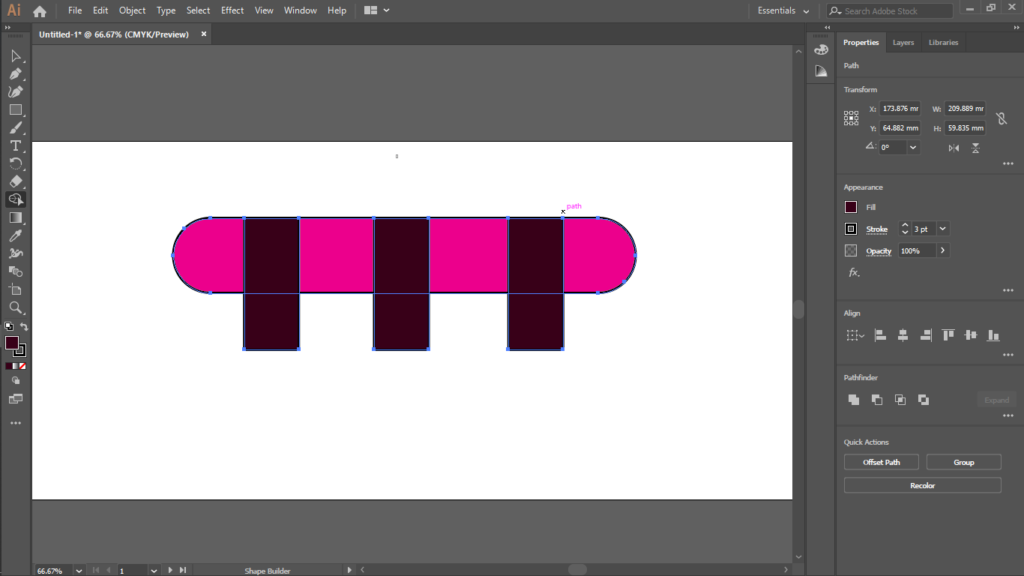
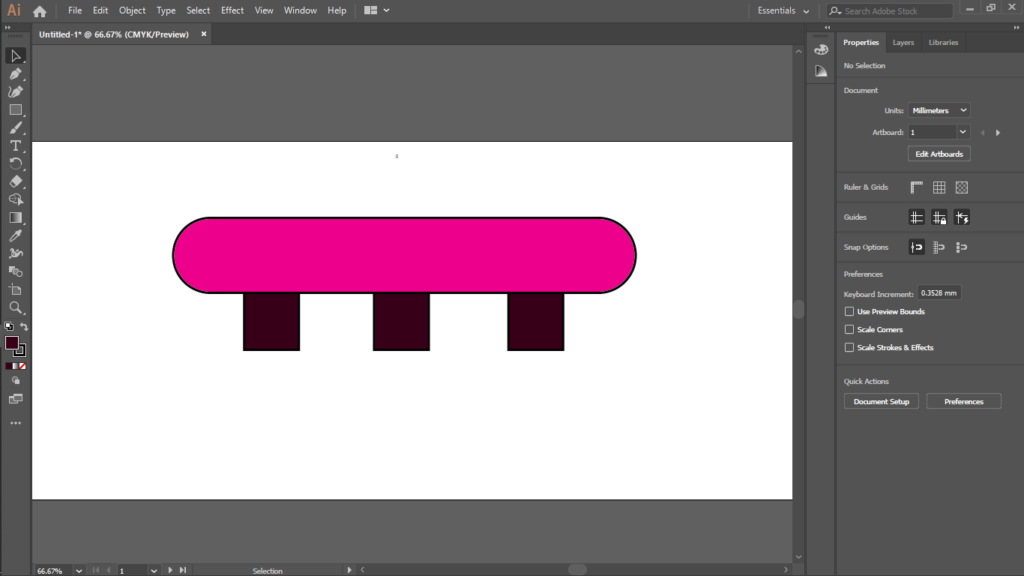
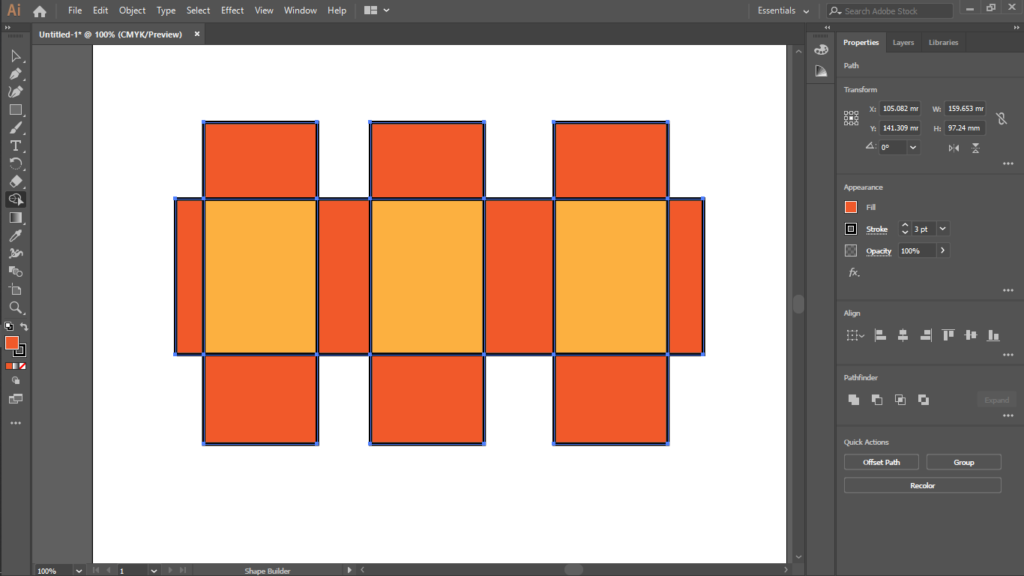
Let join all the parts in the center and give it a different color. So just drag the mouse through the center parts with the shape builder tool without pressing Alt.

When you do, you will see that one color is gone. So pick the big rectangle and change its color to something different. If you achieve the same results as me as shown below, then congratulations. But if you did not, scroll up and follow the steps well.
The last thing left is how you can color different shapes using the shape builder tool. This is something that is very easy to do and you can master it in seconds below…
How To Color Shapes Using the Shape Builder tool In Illustrator?
One big feature of the shape builder tool is its ability to color shapes. You can join many images together and use the shape builder tool to color whichever part of the shape you want to. Let see in a real example by drawing some basic shapes.
First select the rectangle tool and draw a rectangle of the width wider than the length of the height. Don’t give it any color and assign a stroke of 3 pixels or more to it.
Then draw another rectangle of height longer than the height of the first rectangle. Position it to the left side of the parent rectangle with some little margin at the left. Then duplicate it two times and position one at the right and the other at the center of the parent rectangle. So in all, you should have 4 rectangles, look at the below image for reference.
Now you have gotten a different part of the shape. Let see how we can color these parts.
First, select all the rectangles with the selection tool. Then pick the shape builder tool, I think by now you should be familiar with it and the shortcut for it? If you don’t press Shirt + M to select it. While it is selected, pick any color you want to give to the shape with the swatch panel. Next click on any part of the shape and the color will be applied to it. Its so easy right?
Okay, let paint all parts of the shape by repeating the same step. Notice I use only two solid colors in the image below. And if you are able to achieve the same result as me, then you are good to go. You can now color every object with the shape builder tool. I know you want to ask me how you can color with the gradient tool right? But you don’t need to worry instead of picking a solid color why not pic a gradient? Pick that and bam, you are good to give gradient color to any shape with the shape builder tool.
How can you master vector drawing fast?
There is a saying that goes like this “Practice makes a man perfect” and “When you dig in more to a difficult task, it becomes easy.” Learning is not a magic talent, Is something you should put in the effort to do it. If you hate learning, you will not grow much. So all am saying is that practice and practice and you will soon be perfect. That is how all senior graphic designers and I myself started. In the beginning, I was with no idea of how things work, but when I dig in more and practiced consistently, I then became good at it.
So that’s the only way, there is no magic formula for mastering vector drawing. Take it slow in the beginning and learn from people who know. You can only decide to take a course or suggest you learn it on platforms like YouTube for free. I strongly recommend subscribing to this channel (Adobe Illustrator for Beginners | FREE TUTORIALS) for expert advice on graphic design tutorials.
There are so many types of people in this world, others prefer learning by watching and others too by reading. So know who you are and which one will work best for you.
And also don’t be afraid of committing mistakes in the beginning. A lot of people give up on many things so early, but remember nothing is impossible. There is always a good way to do something and your task is to find that way. So if you find yourself not picking up after weeks or months of learning, then remember something wrong somewhere. You need a break to figure out why things aren’t working the way you expect.
No one is perfect, so keep learning and don’t be worried about how creative others are. You can also do it when you dig in deeper.
Check Also:: Angular 10 tutorials for beginners
Illustrator Shape Tools Example
If you have been using adobe illustrator over the past years, there is no doubt that you have been using it for creating shapes. That is one big use of this popular adobe tool. There are a lot of graphic design software’s installed on my computer right now, but whenever I want to design some art, illustrator is what I go for all the time.
Adobe Illustrator CC Shape Builder tool is really easy for creating and combining shapes. I don’t know of how much experience you have in using this particular tool. But trust me, if am being told to select the top tool for you to learn, it will be it.
Because working with it is very easy. I know there is the pen tool also in the tools panel and most people prefer using that. But I do find it more difficult than the shape builder tool. But there is not one tool for creating shapes, each person can actually choose which one will be good for him or her.

But if you already have some knowledge working with Photoshop or coral draw, then using the pen tool will be easy for you. Because that is the tool that is mainly used for creating shapes in these two software’s.
So what I want you to know is that, there is a lot of tools for creating shapes in whatever version of adobe illustrator. So you don’t have to limit yourself to only the shape builder tool. If you are finding it difficult to use it there are other options in the tools panel. You can outsource and see how to use some of it and then pick which one will be good for you.
The easiest way to get started learning a specific tool is to practice using it. I see a lot of people complaining that illustrator is kind of very weird to learn. Whiles I know very well that we don’t have the same level of knowledge, I can truly tell you that the approach most people followers when it comes to learning a new subject is totally wrong.
Because they do say that “nothing is impossible” I personally don’t have any clue of it being wrong or right. But what I know for sure is that when you are so determined about something, then is really possible. Yes I would say that again “When you are so determined, everything is possible but is your mind that you need to convince”
So how can you master all the difficult tools in illustrator?
Well, just as I said right from the beginning your job is to start practicing with such tool. Because the more you use it the more you will become good at it. So you can start creating some basic shapes with some specific tools that interest you. And then later move ahead and create more complex shapes.
Do as I say and you will be good at whatever you wish to learn. The hack is to start from the basic, because if you don’t know how something works and you jump straight to the top level. You will encounter difficulties and if you are not much self-disciplined in life, you might think is impossible to learn. So start from the basics and learn the fundamentals of anything and you can use that knowledge to face more advance problems.
To me there is no difficult tool to learn in adobe illustrator. But below is the example of shape building tools I see people complaining a lot about…
- The sharper tool
- The mesh tool
- The pen tool
- The shape builder tool illustrator 2019
Top Tutorials To Learn Adobe Illustrator
I ones posted some illustration video on YouTube and this is the first comment I got “hey dude, is there any nice tutorial in illustrator for creating art like this?”
What do you think this guy wanted to know?
There is no doubt that he didn’t knew how to use illustrator for creating the kind of art I created in the video. He wanted a guide that will help him to create such kind of art himself. And do you know the funny thing? That single comment got 106 likes in just 3 days.

Because the thing is that you can master the mesh tool, section tool and the pen tool and be able to fill shapes with colors and merge different kinds of objects together. Whiles you are there thinking you have mastered all those tools so you are guru at it, you will see some art somewhere created with the same tools and you will be like “Wow how exactly was this shape created with this tool?”
The adobe illustrator art-board is there for anyone who has downloaded the software to create whatever shapes he or she likes. Your goal is to learn from these people whenever you see an art that seems impossible to be created. Art is all about learning from different kind of people, if you think you know a lot so you don’t need any further knowledge, then I bet you will get your answers when you log on to platforms like be-hence.
So what are the best tutorials that will help you to master adobe illustrator and get hired as a graphic designer?
Well, am not here to claim that I know all the best resources out there because am also an everyday learner just like you. So the little advice I will give you is the guide that has been working for me. And that is to learn from people to whom you can ask questions you don’t understand and get immediate response.
I know what you are thinking…
Hey, that’s it mean that I should enroll in college so that I can ask my faculty whatever I don’t understand about adobe illustrator?
Well, that’s up to you if only you can afford the cost then is really a good choice. Other than that you can learn from online tutorials but make sure you can communicate with whoever you are learning from. Because if your tutor draws some concept that you don’t understand and you do not ask, how will you know it and make use of such concept yourself?
So all what am saying is that follow a tutorial to whom you can reach out to the instructor.
Final Thought on the Illustrator Shape Builder Tool
You have seen how to use the illustrator shape builder tool to create realistic objects out of small shapes. Congratulations! You have really made it through and ready to create whatever shapes you can imagine. So keep practicing and never give up because the more you learn the more you will know.
If you have any issue with all that we have discussed, please comment below and I will respond to you in seconds. Also, don’t forget to share it on your various social media platforms.
I got what you intend,bookmarked, very decent website.
thanks
I reckon something truly special in this website.
thanks
Really nice design and good subject material. Please also check my website. I love cars!